

We always wondered what Japan would be like, although we never really imagined we would actually go there. Our travels through Asia had to include this amazing country, but we knew it was expensive so our decision was to visit only for 1 week.
Why Kyoto?
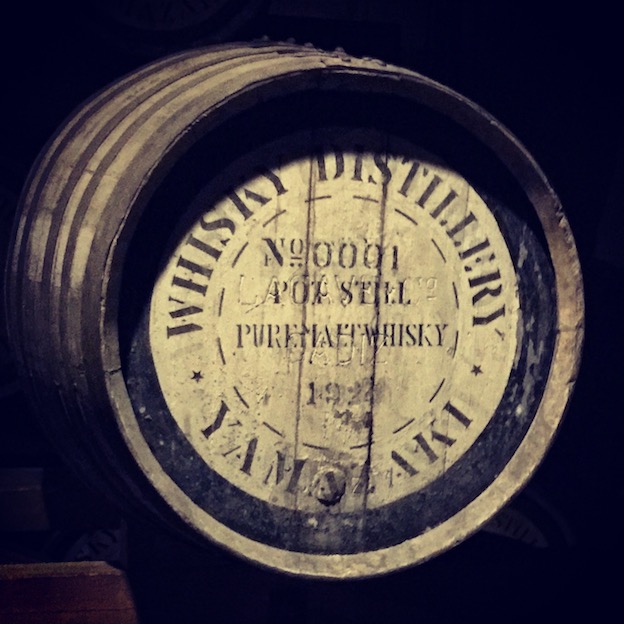
To explain the real reason why it was Kyoto and not another part of Japan, I must admit that it was driven by whisky! Yes…Japanese whisky! Matt is a whisky collector and big fan, as am I, and the Yamazaki distillery is just outside Kyoto (15 mins by train)
We obviously didn’t just base our decision on whisky, but read about Kyoto and how it’s the best place in Japan to experience the traditional temples, shrines, gardens, shops, restaurants and geishas. It was meant to be the most rewarding destination in all of Japan and recommended to be at the top of any Japan travel itinerary, so how could we refuse?
Did you know there are around 2000 shrines/temples in Kyoto alone? Amazing and obviously not possible to see them all, so we had plenty to choose from.
We looked at going in cherry blossom season, during early April, but the advice was to avoid this period and even during Golden Week in early May, if we weren’t keen on masses of tourists and expensive accommodation.
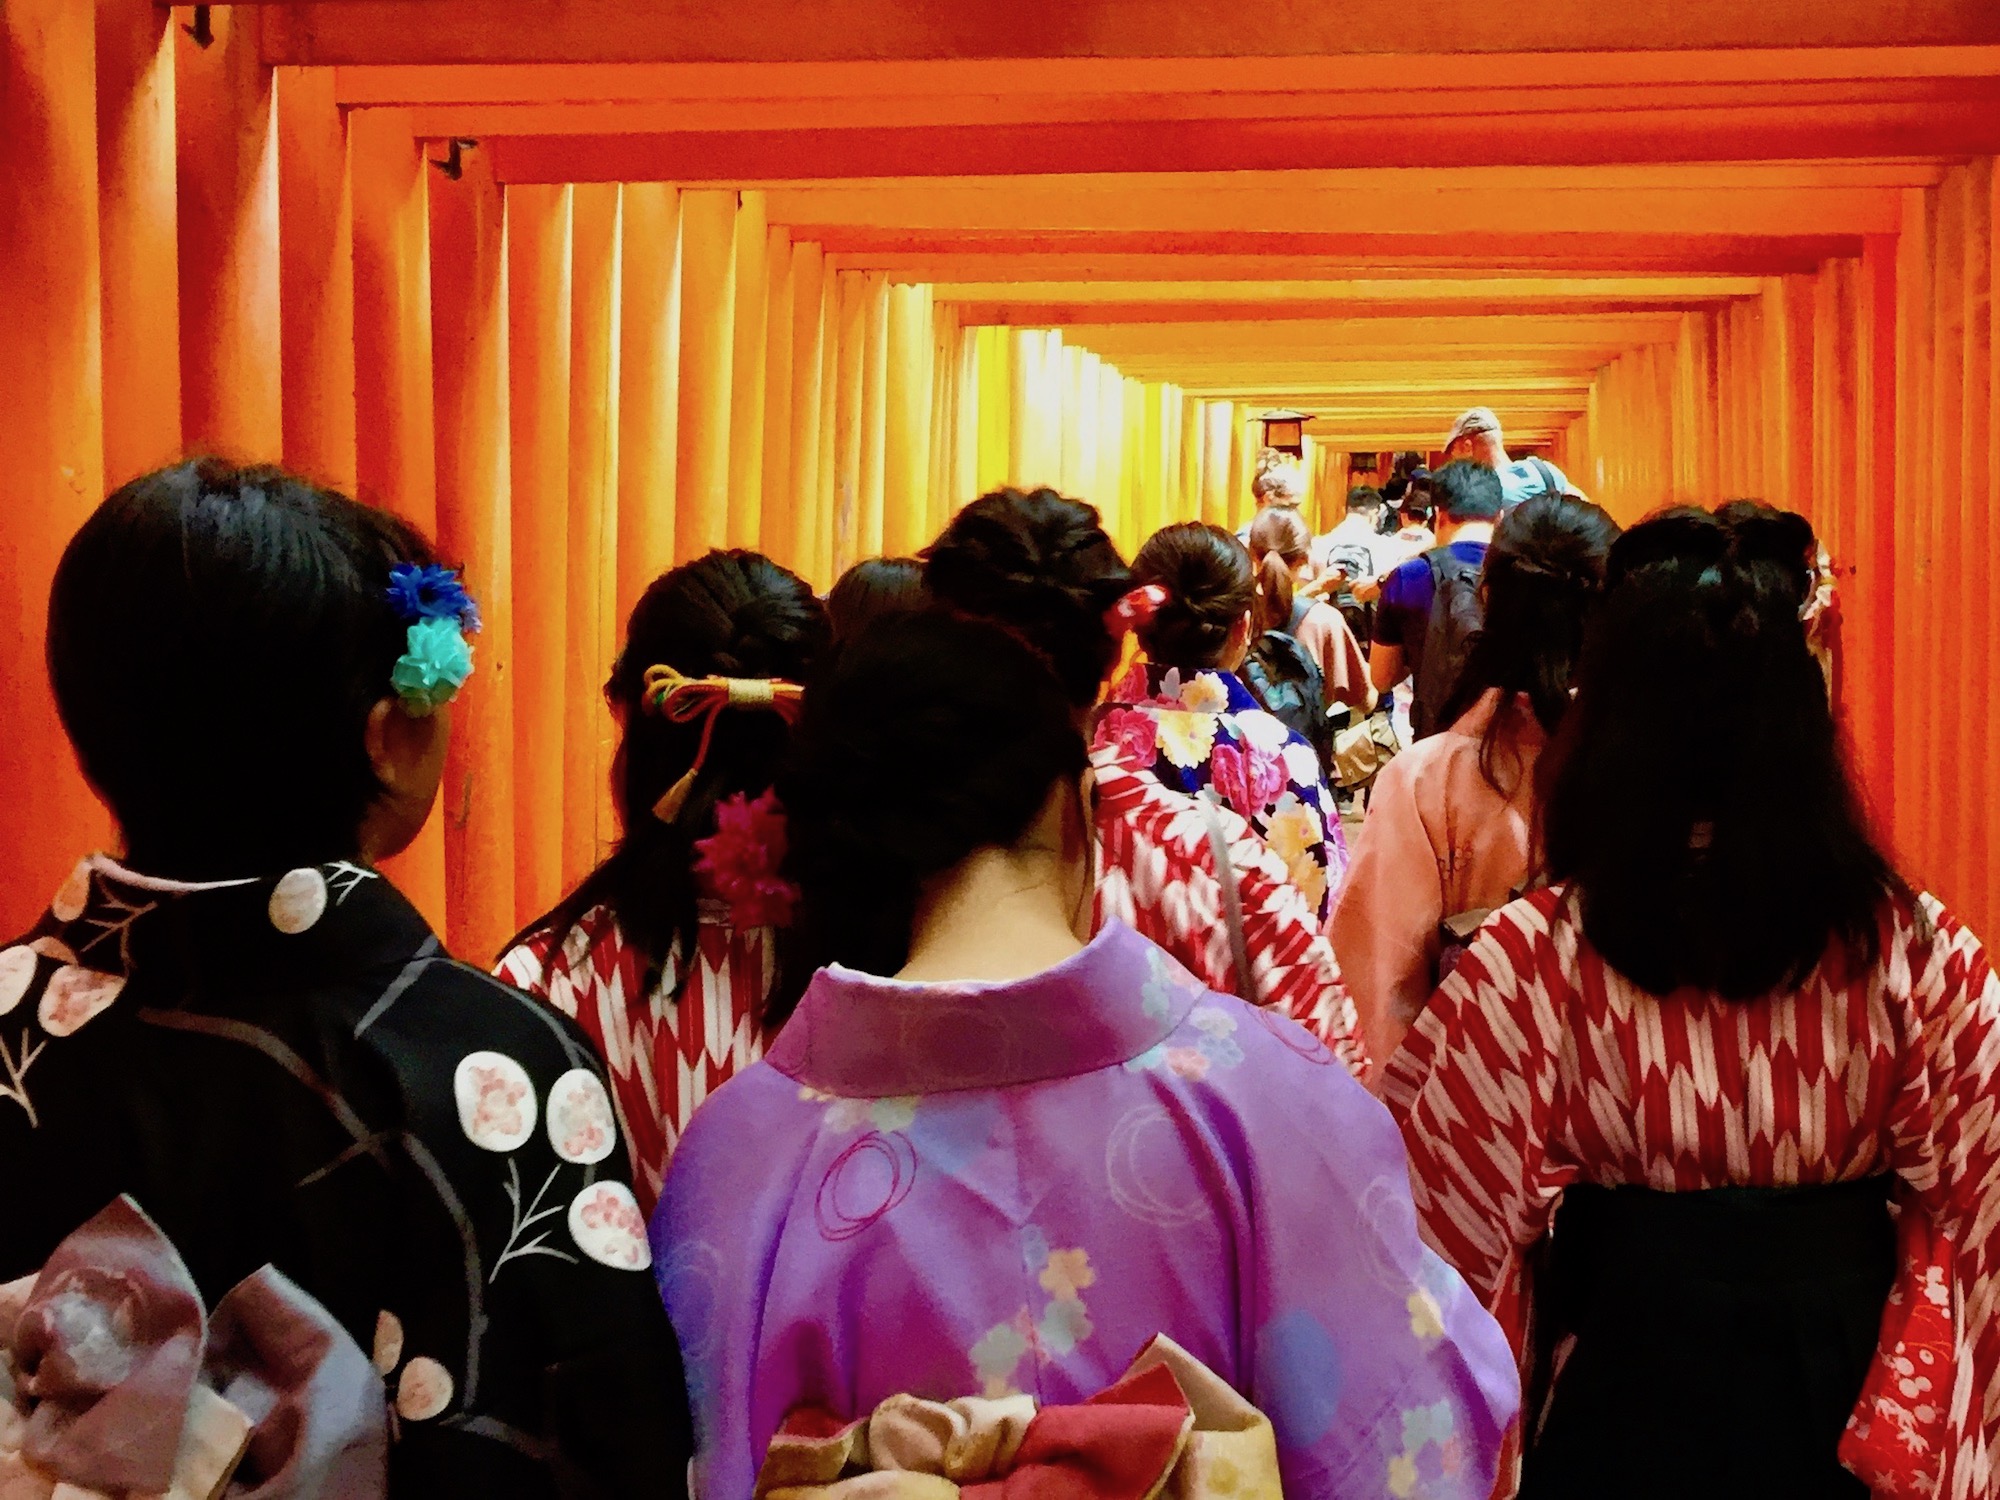
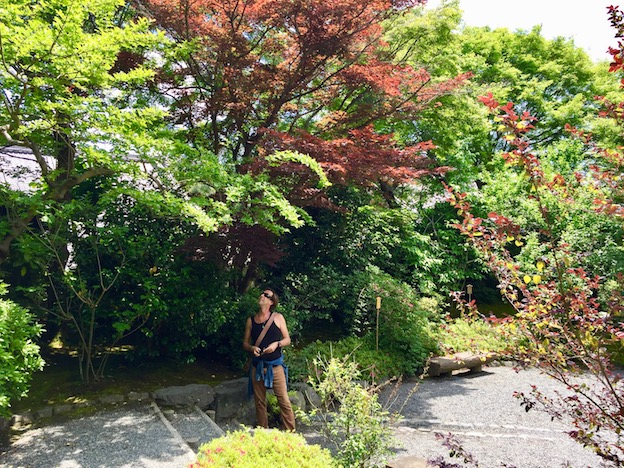
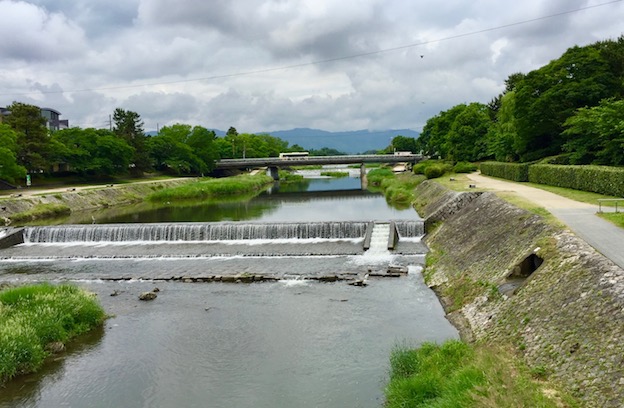
I extensively researched this and coordinated our other travels to fit our visit in towards the last week of May. Unfortunately, cherry blossoms had gone, but the Spring colours of the leaves were still beautiful, with orange, purple and greens running through the landscape and parks.
Kyoto is so clean!
I must say Kyoto was one of the most amazing cities we have seen. So clean (I mean really clean!) and the shrines scattered around make it so beautiful.
There is no rubbish or cigarette butts anywhere in sight. We were actually surprised to find out that smoking on the streets has been banned and you can only do this in designated areas dotted around the city, or you will face a 1000 Yen Fine (approx. £7 / US$9) We saw one of these designated areas just outside Kyoto Station near the bus stop, another on the 10th Floor (outside area) and one more on a main street in Gion (popular area for shopping, eating and nightlife) by the canal.
If you are a smoker, do not despair or be discouraged, as most Family Mart Supermarkets also have ashtrays outside and there are many of these shops scattered around the city. Even most bars will allow this so to not loose clientele. It’s a great way to keep the city clean, but surprising that they banned it as most Japanese seem to smoke (lots of them anyway) If you are a non-smoker, this will be paradise to you!
Where to Stay
Hotels in Japan are really expensive compared to other places in Asia, as they have similar pricing to Europe. The cheapest hotel I could find in Kyoto in May was around £60 a night, which was out of the question for us so we used Airbnb to find a flat instead.
Another option would have been to stay in a Ryokan (traditional Japanese Inn) which was also expensive at this time. A Ryokan is apparently a quintessential Kyoto experience, so it may be an idea to check options on Booking.com and Agoda.com when you go.
The flat we found via Airbnb was in the Demachiyanagi area, in Kamigyo-ku, just 20 mins from Kyoto Station area. It cost us £247 for 7 nights (US$321) which worked out as £35 per night.
Kamigyo-ku is one of the eleven wards in the city, in Kyoto Prefecture (aka Province). Located in the centre of present day Kyoto, it previously occupied the northern region of the ancient capital, when it was a residential district for the royalty and upper classes.
In Kamigyo you will find the Kyoto Imperial Palace and the beautiful Kyoto Imperial Palace Park which you must walk around!
It is beautiful and a lovely area to stay whilst in Kyoto.
Our Flat for the week
This small flat was perfect. It had 3 futons in a large enough lounge area to sleep 6. We used one of the futons, which included bed linen, a duvet and we had fresh towels to last us the week.
The kitchen was a galley compact and clever space, with the bathroom/shower next to it and a wonderful Japanese toilet that I absolutely loved due to the warm seat and of course the crazy buttons!
We even had a patio area with sliding doors, although no view on the ground floor.
Click on the images to scroll through!


It’s so clever what the Japanese do with space – we could learn so much from them!
We never met our host, but communicated with her via the Airbnb app – she was very helpful. Check in was automated and easy; we just had to open the letter box with a code to find the key and put it back at check out.
It was the perfect location as the train line and bus station into Kyoto were close by. She even offered bicycle hire for 2000 Yen a day (approx. £13 / US$17) but we opted for public transport as it was so efficient.
You can find the same flat we stayed in on this link Kamigyo Flat on Airbnb
Honestly, Kamigyo is the best area to stay in if you want to be surrounded by rural Kyoto rather than the more touristy station area!
How to get there from Kyoto Station
To get to the flat from Kyoto Station you have the choice of the number 4 or 17 bus from the A2 bus stop outside the station.
It takes around 20 mins by bus, as Kamigyo sits outside the main Kyoto Station area, and you have to get off at Demachiyanagi Station, which is announced through a speaker and shows up on the monitor (the bus conductor also repeats the station names in a singing voice, so you can’t miss it!)
You can also use the train, by changing from the JR line to the Keihan Line from Tofukuji Station and get off at Demachiyanagi Station.
Here is a link to show you the distance: Map for Kyoto Station and Demachiyanagi
The Airbnb app will show you a map with directions to the flat if you stay there, but it is easier to key in the full address into Google Maps.
How to get around Kyoto
From Kansai Airport in Osaka to Kyoto Station
At the Airport go up the escalators to the 2nd floor, walk to the JR Express office to the far left hand side. Buy a round trip ticket at the counter.
The attendant will give you an IC card per person to use on trains, buses and subway.
The card will have 1500 Yen credit already included, which you just top up at any station – they will also give you a ticket to Kyoto Station from the Kansai airport station for the day you travel and a return to the airport on your departure date (just give them the correct details)
These cards and tickets cost us 5,200 Yen (approx. £36 / US$46)
We were told to return the card on our departure date, which we did and received a refund for our unused credit!
They will also tell you which platform & train goes to Kyoto Station at that time, so you will find it hard to get lost.
The Train Lines in Kyoto
We mostly used the Keihan Line, which is fantastic and most useful to Kyoto visitors, as most of the main attractions lie within the locations along this line (runs through the centre of Kyoto) and you can get to Osaka as well. What more do you need?
The Keihan Line does not connect directly with Kyoto Station, so you will need to transfer at Tofukuji Station on this Keihan Line, as mentioned above, which has both a Keihan and JR station (in case you want to explore and connect to other places).
Once you connect at Tofukuji Station, the Kyoto Station is only one stop away. Easy!
The Keihan Line runs between Demachiyanagi Station, in the north, and Yodoyabashi Station in Osaka, in the south (a total of 42 stations)
We used our IC card for all of our travel, so it does work at all these stations by swiping the card on the reader when you enter and exit. You will find some other stations/lines around Kyoto don’t always accept them, but you can just pay cash if this happens.


The Buses in Kyoto
Buses are boarded from the rear and exited from the front! – it’s actually a really good system. Payment is made once you leave the bus at the front into a machine next to the driver – swipe your IC card to pay!
Within the city there is a flat fare zone, where adults pay 230 Yen and children under 12 years old pay 120 Yen. If you go outside of the city, you will have to pay extra.
If you are using cash rather than your IC card, you should have the exact change to make things easier, otherwise they do have a change machine beneath the payment slot that can give you coins and change for a 1000 Yen note.
When using cash, take a numbered ticket when you enter the bus. The screen at the front will show your number and fare.
We found it easier to use the IC card to pay for all transport and check the balance every now and then at any given station to make sure we had enough (machines will let you check the balance and/or top it up)
I have provided a link with Bus info and a map at the end of this blog, under ‘Resources’.
The Taxi experience in Kyoto
These are very glamorous looking in Kyoto. You will see the drivers wear a suited uniform, including hat and gloves. They look like proper chauffeurs!
Definitely an experience!
How to grab a cab in Kyoto?
- There are taxi ranks outside most train stations, bus stops and some supermarkets. You can also flag a taxi on any street.
- Apparently it’s custom to enter a taxi from the left side of the car. The driver will open the door for you.
- It helps to smile and say good morning; ‘Ohayo gozaimasu’, hello; ‘Konnichi wa’ or good evening, respectively; ‘Konbanwa’, when you board. It just might put you and the driver at ease!
- Most drivers understand enough English to know where you want to go, but it always helps to have your destination written down in Japanese (either google it or ask a local before you travel)
- The driver will always turn on the meter and you don’t have to worry about being charged too much. The meter will show the fare.
How much do Taxis cost in Kyoto?
- There are many taxi companies in Kyoto, but we found MK Taxis to be cheaper.
- Most taxis cost 640 Yen (£4.38 / US$5.71 for the first 2km) However, MK Taxis (you will see the letters on the roof of the car) only cost 580 Yen (approx. £4 / US$5)
- Taxis mostly accept cash, but some accept credit cards. It’s better to have cash on you just in case!
- It isn’t a necessity, nor is it expected, to tip the driver, but most people, including us, just rounded up the change for the fair.
We took a taxi twice whilst in Kyoto; once when we had been to one of the temples, needed to get back to Gion for food and had enough of walking. The second time was in the evening after having a few drinks too many! Well, Matt had one too many really, but rather a taxi than having to carry him on the Underground line!
A taxi is well worth it in Kyoto when you have done a lot of walking and want that comfort! My philosophy is: when you are in a new undiscovered country, one should try out unique experiences and elements that are typical to that place. So being driven in an elegant car with a Chauffeur looking taxi driver qualifies!
Our 7 Day Itinerary in Kyoto
We actually stayed in Kyoto for 8 days, so that we had the full 7 days and nights to enjoy the city.
You can follow our itinerary if you wish to, or use a mix from the itineraries provided on the Inside Kyoto article (also provided again at the end of this blog under ‘Resources’) We used this article a lot to help us decide what to do.
However, the article covers so much, that it can seem complicated to choose the right itinerary, so I have made it much easier to grasp on our guide to save you the research!! We picked the best places and they were fab!
If I could give you one piece of advice, it would be not to overdo things. Don’t try to rush by cramming too much in, as 2 shrines a day is plenty. You can mix your day up with some walking, eating and drinking in areas like Gion and Higashiyama. I have also provided you with some cool places to eat and drink after this itinerary!
Day 1 – Enjoy some Whisky & Food
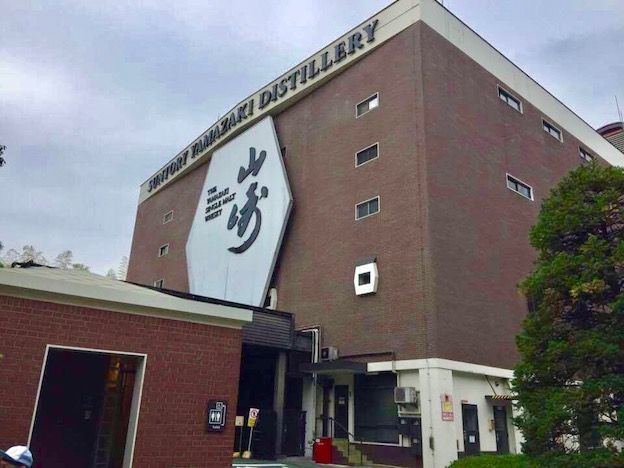
1. Book yourself onto the 1-hour Tour at the Suntory Yamazaki Whisky Distillery – if you want to try Japanese whisky at a fraction of the price in bars!
Reserve your place online onto the tour: It costs 1000 Yen (£7 / US$9) and you pay on the day at the distillery (cash only). You automatically get to see the museum at the end of the tour, where there is also a whisky bar on the ground floor.
You will sample whiskies as part of the tour and then get to buy more at the museum bar if you want! There is also a shop where you can buy a bottle and other souvenirs.
If the tour tickets are taken, check the ticket availability for the whisky museum instead, which luckily is free, but you still have to reserve your spot online if you are not going on the tour.
You can use this link to reserve your place Suntory distillery website
Matt was lucky enough to find the last tour ticket available for the month at short notice, but the advice was to book online well in advance (usually 1-2 months before) as it gets really busy.


So whilst Matt went on the tour, I was booked into the museum which tells the history of Suntory and their Whiskies. I then headed downstairs to the bar where I sampled 3-4 Whiskies whilst waiting for him to finish.
We ended up spending 4 hours there; trying some Japanese Whiskies we were already familiar with and other rarer ones we hadn’t had the chance to sample before.


Top Tip to Remember
Make sure you book well in advance! Take cash to pay for the tour at the front cashier office, as it’s cash only and online bookings only reserve your spot.
Whisky Prices at Suntory Vs Kyoto Bars
At the Suntory distillery you can have a 12-year-old Yamazaki whisky for 200 Yen (approx. £1.30 / US$1.70), whereas in a Kyoto bar this will cost an extortionate 2000 Yen in comparison (approx. £13 / US$17) – crazy hey?
The beauty is that this museum bar is free to book yourself onto and open every day. So you could always go back one afternoon for more, if there are spaces available.
How to get there from Kyoto Station
To get there from Kyoto Station, you will need to go to the second floor up the escalators and go to platform number 4 to head to Yamazaki Station. The distillery is just a short walk away from the station (there are signs pointing you in the right direction) and you can actually see the building whilst you are walking.
2. Go into Kyoto Station – get familiar with the area
Kyoto Station is big and full of restaurants and shops, so lots to see. Head to the 10th and 11th floor for some lovely dishes, including Ramen (noodles) and other types of Japanese dishes.


Another good food court at this station is just outside. You will find some escalators going into a basement food court and shopping mall. They even have a Starbucks down there, if you fancy a coffee and some familiarity!
I have provided more details under ‘Places to eat & drink’ after this itinerary.
Day 2 – Visit these amazing Shrines
1. Shimogamo-jinja shrine (…Admission is free…)
This Shrine has the most beautiful grounds and an eerie atmosphere. You will reach the main hall in this shrine by walking through a pebbled path through a forest, known as Tadasu-no-Mori, with lots of ‘Broadleaf Trees’ which are now rare in Japan.
We were there towards the end of May, so we missed the Yabusame Contest (horseback archery) so if you are there on the 3rd of May, they say it’s a must see!
Shimogamo-jinja Shrine is also the final stop of the parade that forms the heart of the famous Aoi Matsuri, one of the 3 main annual festivals in Kyoto, held on the 15th of May.


How to get there
This Shrine is a short walk from Demachiyanagi Station on the Keihan Line,, close to the flat we stayed in.
2. Fushimi Inari-Taisha Shrine in the Inari village (…Admission is free…)
My favourite shrine of all, where you will find over 1000 Vermilion Gates.
Fushimi Inari Shrine is an important Shinto Shrine in southern Kyoto and famous for its thousands of Vermilion Torii Gates (1 or more Torii Gates mark the entrance to a Shrine) They are represented in various colours, usually Vermilion, which is Orange, or Black, and most are made of Wood.
These Torii Gates connect a network of trails behind its main buildings. The trails lead into a wooded forest of sacred Mount Inari, which stands at 233 meters and belongs to the shrine grounds.
Fushimi Inari is the most important of several thousands of shrines dedicated to Inari, the Shinto God of Rice and foxes are thought to be Inari’s messengers, which is why you will find many fox statues dotted across the shrine grounds. It is a fascinating place!


The gates and steps are vast and you need a bit of stamina to get to the top. We didn’t make it all the way, but enjoyed the ascent that we did and found that to be enough! Whilst half way up you can see lovely views of Kyoto.
Definitely not a Shrine to miss!
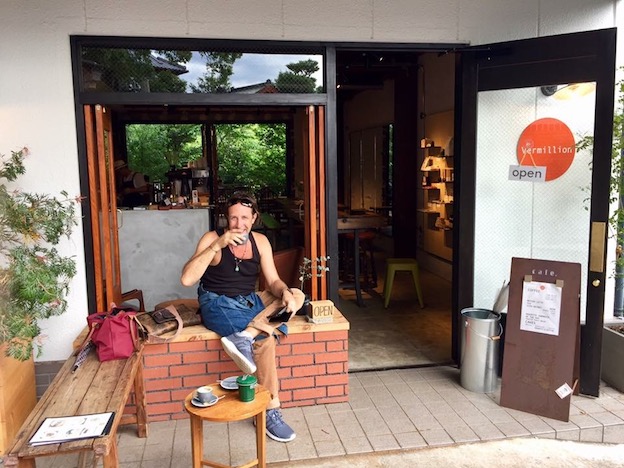
On the way down there is a lovely Cafe called Vermillion (of course!) and they have seating at the front or in their patio area overlooking a pond.
How to get to Fushimi Inari Shrine
This shrine is in the Inari village and is located outside of the JR Inari Station (2 stops from Kyoto Station on the JR Nara Line which takes 5 minutes to get to) You can also get to the shrine from Fushimi Inari Station (on the Keihan Main Line)
Day 3 – Explore Gion
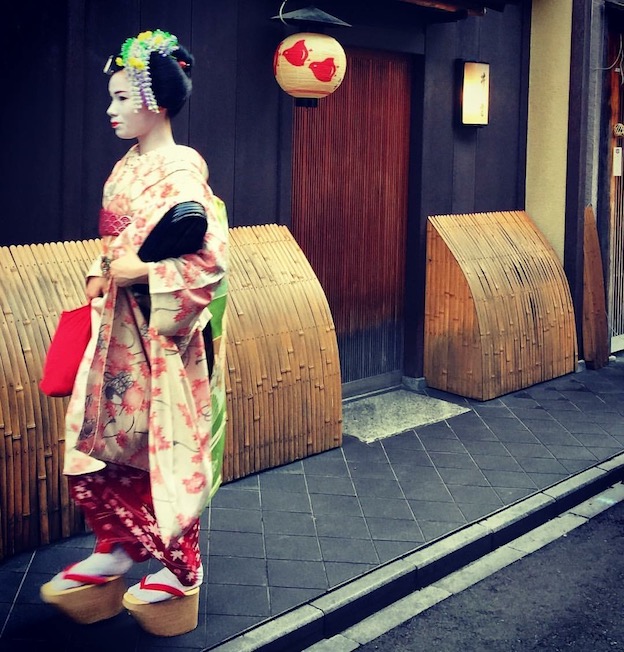
1. Walk around the alleyways of Gion and try to spot the elusive Geisha
Gion itself is a lovely part of Kyoto, full of bars & restaurants and lovely little alleys you can walk down to really appreciate Japanese architecture, culture and style.
Don’t miss out Pintocho alleyway, as lots of good bars and restaurants down there.
It is usually hard to spot a Geisha, however if you do you will most likely see a Maiko (apprentice Geisha) which you can tell by the Kimono (bright colours and a scarlet-fringed collar, which hangs loosely in the back)
We were lucky to spot 2 of them in our entire trip to Kyoto; the 1st one was walking down Pintocho alleyway in the Gion area and the 2nd was in Higashiyama, waiting for a client, whilst standing next to a Taxi.
They say the best time to catch them is between 5.30 and 6pm, just as they walk to work where they entertain Businessmen or V.I.Ps, usually in a licensed Ochaya (Teahouse)


There is a bit of a taboo when it comes to geishas, as some would think they are there for sexual reasons. Whilst they are meant to encapsulate Japanese femininity and beauty, they are there to entertain by performing, which would be either through dance, singing or playing a musical instrument. If you want to read more about geishas take a look at the article on this link about Geishas
We ended up staying in Gion that evening and returned a couple of times during our trip to enjoy some Sake and great food, which I will cover further down on ‘where to eat & drink in Kyoto‘.
How to get to Gion
Go to the Shijo Station on the Keihan Line from your destination
Day 4 – Exploring more amazing Temples and Shrines
1. Tenryu-ji Temple in Arashiyama & the Bamboo Forest (…Admission Fee 500 Yen…)
Tenryuji is the most important temple in Kyoto’s Arashiyama district. It is ranked as number 1 out of the city’s 5 great Zen Temples and is classed as a World Heritage Site. It was built in 1339 (a long long time ago!) by the ruling Shogun of that time, Ashikaga Takauji.
He dedicated this temple to the Emperor Go-Daigo, who had just passed away. Takauji intended to appease the former Emperor’s spirits after turning on him in a struggle for supremacy over Japan (so it was a kind of remorse!)
The temple and other buildings were repeatedly lost in fires and wars over many centuries, so many of the halls date back to the Meiji Period (1868-1912)
Japanese history is truly mind boggling and we loved learning little bits, but it is hard to take everything in. I want to mention some of it here, to inspire curiosity!


Once you have walked around the shrine and gardens, make your way uphill away from the Main Hall and exit the temple’s garden by the North Gate. If you take a left you will reach the Arashiyama Bamboo Grove and Forest, which is stunning and another must see!


There is just one main path through the grove which ascends slightly. Once you get to the top of the hill you will reach the entrance to the famous Okochi-Sanso Villa.
How to get to Tenryu-ji Temple
- 1 min walk from Arashiyama Station (Keifuku dentetsu) on Arashiyama Line
- 13 min walk from Saga Arashiyama Station on the JR Sagano Line
- 15 min walk from Arashiyama Station on Henkyu Railway
2. Kinkaku-ji Temple – also known as Golden Pavillion (…Admission Fee 400 Yen…)
Kinkaku-ji is the famous Golden Pavilion, Kyoto’s most iconic sight and Zen Temple in northern Kyoto. It’s top two floors are completely covered in gold leaf and the landscape and views are breathtakingly beautiful. It’s well worth a visit, however it’s advisable to try and pick a time when the crowds aren’t there (early morning just as it opens or later in the afternoon) and avoid the place on holidays, as there will be too many people to enjoy it. We just about got away with it!
Formally known as Rokuonji, this temple was the retirement villa of the Shogun Ashikaga Yoshimitsu (same first name as the other Shogun!) This Shogun left the Golden Pavilion in his will to the Rinzai Sect after his death in 1408, when it became a Zen Temple!
The Golden Pavilion is an impressive structure built overlooking a large pond surrounded by a stunning scenery.


How to get to the Golden Pavilion
In front of Kinkaku-ji there is Bus stop, so you can get the Kyoto City Bus 101 or 205 from Kyoto Station, which will take about 40 minutes (we used the 205). Alternatively, you can reach it by taking the Karasuma Subway Line to Kitaoji Station (15 minutes’ journey) and then a taxi for approx. 1200 Yen (£8.27 / US$10.78) or take the Bus from the Kitaoji Subway Station (numbers 101, 102, 204 or 205) to Kinkakuji.
The Kyoto Public Transport network is amazingly efficient and easy to work out if you have internet Wifi of data, so take advantage of it with these tips!
Day 5 – Learn how to make Japanese Tea & walk around Higashiyama
1. Japanese Tea Ceremony at Camellia Flower (…A worthwhile 2000 Yen Fee…)
We chose this Tea Ceremony due to the great reviews on Trip Advisor. It is located in the Higashiyama area, right off Ninen-zaka (one of Kyoto’s most important tourist lanes with lovely shops) not far from Kiyomizu-dera Temple and the Yasaka Pagoda, which you may want to take a look at after.
Camellia is run by a lovely bilingual lady called Atsuko Mori. Her tea ceremony isn’t as formal as others apparently, with a nice mix of formality and casual informality (it’s basically interactive so you will enjoy it more) We were encouraged to relax as Atsuko explained the history of the tea ceremony.
It was really interesting to learn that historians consider tea ceremony to have been perfected in Japan, even though it originated in China. The Japanese tea ceremony is a 400-year-old tradition and only men used to perform the ceremony until about 150 years ago!
We watched her perform the ceremony, with graceful movements and precise timing, and then got the chance to emulate this by making our own Matcha Tea in a bowl (Matcha is a finely ground powder of specially grown and processed Green Tea)


It’s easy enough to make a cup of Matcha Tea, apart from the whisking which takes quite a bit of technique. We all got a bit of extra help from Atsuko!
Here are the details for Camellia Flower Tea Ceremony
- Opening hours: 10:00-18:00 (open daily)
- Tea ceremony sessions start at: 10:00, 11:00, 12:00, 13:00, 14:00, 15:00, 16:00, 17:00, and takes 45 minutes, but must be booked online.
- Price: Adults – 2000 Yen (£13.72 / US$17.86) and Children – 1000 Yen (under 18 years old)
- Address: Camellia, 349 Masuya-cho, Higashiyama-ku, Kyoto City
- Website: Camellia Flower
Click on this link to read more about the Secret meaning of the Japanese Tea Ceremony
2. Walk around Higashiyama
The Higashiyama district runs along Kyoto’s eastern mountains and is one of the city’s best preserved historic areas. You can really experience the traditional old Kyoto here, with narrow lanes, wooden buildings and merchant shops that show their age. The streets are lined with shops, cafes and restaurants.
Many shops sell sweets, tea, pottery, crafts amongst other Japanese souvenirs. After our tea ceremony we bought some Matcha Sweets in one of the shops (they even let you sample them before you buy!!)
You can even find Kimono rental shops where some tourists opt to dress up for the day and pose for photos around the iconic sites. We saw a mix of Japanese, Chinese and Europeans dressed in Kimonos (female and males, as there are different styles for both) but they did look quite uncomfortable whilst walking, due to the robe’s restriction and wooden shoes (quite funny to spot – good for people watching!)
We went to Ninen-zaka and Sannenzaka, which are historic stone paved streets, lined with lovely wooden Stores and Cafes. Well worth a visit!
We then walked slightly to the west up to the Yasaka Pagoda, before walking back into Gion.
There is so much to see in Higashiyama, you could easily spend the whole day here and end up back in the Geisha district of Gion just by walking – it is a lovely stroll!
Google maps was our saviour!


Day 6 – Visit a Buddhist Temple & The Philosopher’s Path
1. Sanjusangen-do Temple – also known as Rengeo-in Temple (…Admission Fee 600 Yen…)
This was actually a great recommendation by a friend. It’s a must see when you travel to Kyoto, as you won’t forget it! We loved it!
Sanjusangendo is a Buddhist temple in the Higashiyama district, known for its 1001 Golden Statues of the ‘Thousand Armed Kannon’, the Goddess of Mercy.
The temple was founded in 1164 and partially burnt by fires, so they had to rebuild and make newer statues a century later. So there is a mix of original Kannon Statues and some that were built in the 12 and 1300s. The Temple Hall is the longest wooden structure in Japan, measuring 120 metres!
In this main hall, you will see the giant statue of ‘Kannon’ in the middle and 500 life-sized statues of the ‘Thousand Armed Kannon’ at either side, in 10 rows and 50 columns to make up the 1000. The statues are made of Japanese Cypress Wood and covered with gold leaf.
Each statue has 11 heads, to better witness human suffering and 1000 arms to better help them fight against this suffering. However, you will see that these statues only have 42 arms (they subtract the 2 regular arms and then multiply by the 25 planes of existence to get the full 1000) Are you lost yet?… So interesting!
The 1001 statues are fronted and guarded by 28 Gods (The God of Thunder, Water and Wind are amongst them)
It is definitely an amazing spectacle! It was worth the visit and probably our most memorable temple, after Fushimi Inari.
They don’t let you take pictures inside the main hall, so I had to get some of the statues off their website for you to see!


How to get to Sanjusangendo
The temple is a 5 to 10-minute walk from Shichijo Station (Keihan Line)
You can also get there by Bus from Kyoto Station by getting the numbers 100 or 206 to Hakubutsukan-Sanjusangendo-mae bus stop (a bit of a mouthful!!)
2. Philosopher’s Path (…Admission is Free)
The Philosopher’s Path is open 24/7 and doesn’t need admission. It’s not marked with an entrance as it’s just a path that runs for approx. 2 kilometres along a canal in northern Higashiyama; running between Ginkaku-ji Temple (Silver Pavilion) in the North and Nanzenji & Eikan-do Temples in the South, Nanzenji neighbourhood.
The path got its name from Japan’s most famous Philosopher and Professor called Nishida Kitaro, who was said to practice meditation whilst he walked this route on his daily commute to Kyoto University.
The path is lined with cherry trees, so even more beautiful during cherry blossom season (usually the trees burst with colour in early April, making it one of Kyoto’s best cherry blossom viewing spots), however it’s much more crowded at this time.
We went at the end of May when it wasn’t too busy. It was beautifully green, but no cherry blossoms to see.
We found this place beautiful and romantic, and by that time we were templed out, so it was a welcomed change!


How to get to the Philosopher’s Path
If you’d like the easiest way to get there, go south to north, by starting your walk from Nanzen-ji Temple (take the JR Tozai Subway Line to Keage Station, which is a 10 min walk to Nanzen-ji Temple) rather than taking a Bus if you started at the Silver Pavilion in the North instead. You can also get a number 5 Bus to Nanzenji-Eikando-michi bus stop from Kyoto Station (35 minute journey)
You may find you walk a bit more, as may want to return to where you started, but it’s worth it if you don’t want to get lost! There should be maps that tell you where to go or just use Google maps.
Although the Philosopher’s Path (also known as Philosopher’s Walk) isn’t a major site in Kyoto it is still found via Google maps.
Day 7 – A walk in the Park
We decided to take it easy on our last day and just stick to Kamigyo, where we stayed.
1. Kyoto’s Imperial Palace Park (…Admission is Free…)
This park is a green oasis in the heart of Kyoto. Unlike the Imperial Palace, this park is free to enter. Not many people were there when we visited, so it was really nice to take some time out and chill.
Great for garden or nature lovers, this park is full of Weeping Cherry Trees (must be amazing in late March / early April, as they are said to be the most spectacular Cherry Blossom spots in the city!)
Although we didn’t get to see them in full bloom, they were still beautiful! Unfortunately I didn’t take any pictures – enjoyed it so much, I forgot! But that then leaves a bit of mystery for you!!
Whilst there, you will see runners, walkers, picknickers (made up word!) and couples walking hand in hand through the intersected wide boulevards and narrow pathways that make up this gorgeous and large park. Well worth a visit if you want to get away from the traffic and temples for a while.
2. Walk around Kamigyo Ward
There are quite a few Shrines in Kamigyo itself, as well as the Imperial Palace Park, but if you just fancy walking around, like we did, you can follow the park’s wall by walking around it on the street (just to warn you it’s enormous, so it could take some time!) We found Coffee shops, restaurants and just enjoyed this lovely ward and its streets.
You could choose to cycle instead, if walking isn’t so much your thing!
Where to Eat & Drink in Kyoto
We didn’t do any fine dinning whist in Kyoto as we were on a budget, but there are many gorgeous restaurants and Michelin Star options to choose from and you can find these easily on Trip Advisor.
I am providing more affordable but awesome places we went to and highly recommend!
Restaurants in Kyoto Station
As mentioned earlier, it is well worth trying out the Ramen Noodle restaurants on the 10th Floor of the Isetan Department Store, but there are plenty of other types of dishes to choose from.
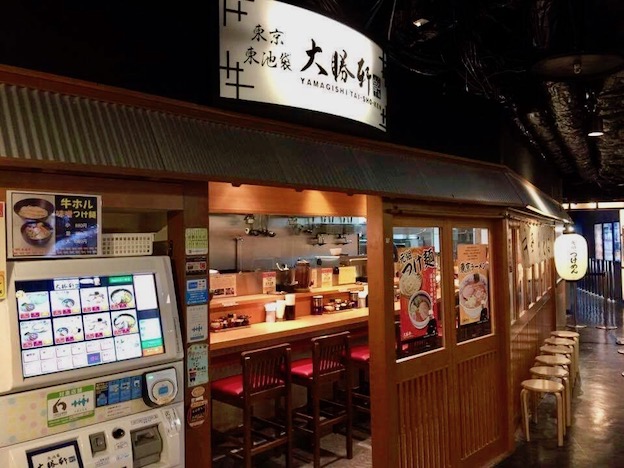
Kyoto Ramen Koji Food Court (10th floor)
There are eight restaurants on this floor, offering a wide variety of different Ramen. You will find every restaurant has a Vending Machine just outside their door, where you can look at their selection of Ramen through pictures.
First choose the restaurant you like the look of and then make your selection via the Vending Machine; pay your money into the slot and pick up the ticket to give to the waitress, who will seat you down at a table (choices vary from Pork, Chicken, Beef, Shrimp or Vegetarian)
A meal here will cost you around 600 – 800 Yen (approx. £4–5 / US$5-7)
Cube Food Court (11th floor)
Restaurants here are more upmarket and slightly more expensive, but still worth a look.
Porta Food Court (Basement)
Head to the basement outside the station for more variety. I must note that only a handful of restaurants here have English menus, so check the pictures and make your choice.
We went for a Teppanyaki Restaurant, which was lovely. They offer Meat, Shrimp or Veg with Noodles, which is cooked on an Iron Plate in front of you, with a lovely mix of Soy Sauce and other Spices. Prices can range from 1200 Yen (approx. £8 / US$10)
Restaurants in Kamigyo
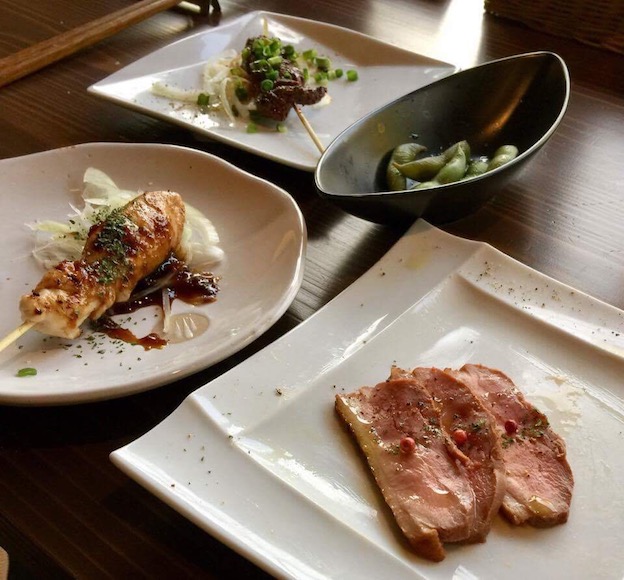
Elmo
Go here for Tapas (a sort of Italian / Japanese fusion – sounds odd but it was fab!)
We had Smoked Duck (small plate), Chicken Sate Skewers, Edamame Beans, Sirloin pieces marinated in god knows what but all the dishes were amazing! – prices were higher here; our bill came to around 4500 Yen (£30 / US$40) including drinks (a Beer costs around 500 Yen / approx. £3.50 / US$4.40)
Kikyo Sushi
Best Sushi I have ever tried (and I’ve been to some good Sushi places in London)
Even now when we remember it or I mention it, whilst writing this blog, we both make yummy noises! Haha!
It’s advisable to book upfront as it’s a small restaurant and gets rather busy.
This place was highly recommended by Trip Advisor and prices were really reasonable! You can choose from various set menus or pick and mix. From memory the set menus are from 1200 Yen (approx. £8 / US$10)
Sushi to die for!
Matt went for the Sushi and Tempura combo, with a side of ‘Bonito Tataki’ (which was Tuna with Spring Onions and god knows what other lovely seasoning!)


I had the second combo (sorry, the name escapes me) which had Tuna, Kingfish, Snapper, Eel, Octopus, Cockle, Squid and also Yellow Fin Tuna.
We also ordered the Salmon Sashimi which was out of this world!!


Yummy Sake!
It’s a must to accompany your meal with Sake, if you like it. Trust me, it’s so good.
We tried the hot sake first and then ordered the Sake Taster (4 cold sake to share) My favourite was the ‘Sawaya Matsumoto’ from Kyoto itself (highly recommended)
Couldn’t find this sake anywhere in the shops or other bars when I looked, so it’s worth a try here.
It’s a family owned restaurant with a great story!
The son went travelling, learnt English, lived in a few countries including US & Canada and then came back to help his parents run the restaurant.
This family ran the Sushi restaurant for 3 generations before and prepared Sushi for the Kimono Fairs and Exhibitions back in the day (when Kamigyo was a higher Class area)
After the Son returned from his travels, he tried to drum up business with westerners as he now spoke English. He suddenly found himself welcoming more tourists and one day asked them how they heard of Kikyo, only to find out they had read many reviews on Trip Advisor. Now they are a top rated Sushi restaurant in Kyoto on the app!
Although you may find mostly westerners here, don’t be put off. It’s well worth it!
Top Tip
Make sure you book ahead and accompany your meal with Sake!
Restaurants in Gion
Akiyoshi Restaurant
Best Yakatori dishes ever! (Meat on Skewers) So good, we went back and had it again!
This is a lovely restaurant with an open kitchen facing a bar to sit down at, so you can watch them cook, and tables dotted around the restaurant (you get seated wherever is free or they take your name down and tell you to come back at a certain time)
They have a lively environment where the waiters and kitchen staff shout out dish names and words of encouragement (great buzz!)
We tried lots of different Yakatori dishes, including the Sirloin & Spring Onion, Pork Belly, Tender Chicken and the Green Peppers Yakatori, and even a side of French Fries!
It was a sublime experience and I couldn’t recommend it more!
Dishes range from 350 Yen (£2.40 / US$3.12) so it’s very affordable!


Restaurant at the Inari Village
Kendonya
A small handmade Udon noodle Restaurant, with an English menu! Lovely dishes. A good spot to eat before or after visiting the Fushimi Inari Shrine. A bowl of noodles will cost you from 800 – 900 Yen (approx. £6 / US$8)


Bars in Gion
I would recommend to use google maps to find these bars by name and city.
Ki Bar (Whisky and Sake Bar)
Down one of the alleyways in Gion called Pontocho (mentioned before!), you will find many bars and restaurants. This one was brilliant, with friendly staff and a great selection of Sake and other drinks. Sake ranges from 500-800 Yen (approx. £3.50 – 5.50 / US$4.50 – 7)
The cozy and small space promotes a friendly environment, where you can’t help but talk to people in there. We met a lovely bunch, who we connected with via Instagram to stay in touch and share travel photos!
If you find yourself in Gion, don’t miss this bar down Pontocho.


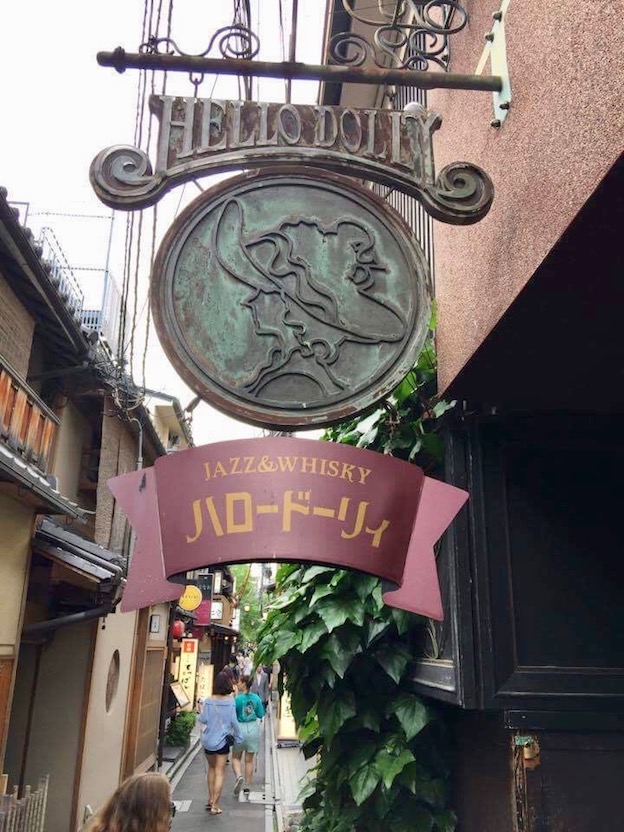
Hello Dolly (Whisky and Jazz bar)
Also in Pontocho. If you like Whisky and Jazz, this is heaven on earth!
Irish Pub Wisteria
Great pub near the Nishiki Market, serving food and all kinds of alcohol including both Irish and Japanese Whisky.
Drinks in Japan are expensive, so no different here. If your budget stretches, then it’s worth giving this pub a try.
A Beer will cost you around 750 Yen (just over £5 / US$6) and Japanese Whisky from 2000 Yen (approx. £13 / US$17)
The owner is Japanese and the barman from Colombia. I was expecting a joke to come next! Hehe.
Whilst we were chatting to the barman, he told us that we had to go to another bar that opens from 9pm and sits on top of Elephant Coffee shop in Gion. The bar has no name and seemed quite mysterious as he wouldn’t tell us much more about it; just said that we had to check it out!
Elephant Factory Coffee Shop
Located off the busy Karawamachi Street (also close to the Hankyu Karawamachi Station from Shijo Street)
They serve the best coffee!!
The secret bar with no name (opens from 9pm)
This is the bar we were told about by the Wisteria Barman. It sits on the top floor above Elephant Factory Coffee.
As you walk up the stairs (2nd floor), past Elephant Coffee, you will see the wooden door has a handle wrapped in parcel tape and looks like it’s about to fall off, seriously! However, once you open the door you will find a long bar and seating area at the far end, lit only with candles, giving this place a lovely chilled atmosphere.
The fact that it had no name and was entered by a door that gave the place a look of abandonment, just made us wonder what we were about to walk into! It was a pleasant surprise, as they served all drinks at 700 Yen (£4.80 / US$6.25) including Whisky!
We went there with the group of people we met at Ki Bar, who were willing to take this mystery tour with us! We were the only tourists there! There were only a couple of young/hip locals sitting at the bar in the entire place.
Definitely a must if you are up for a cheaper good night out!
One word of advice though; don’t mix sake, whisky and beer. If you do, make sure you have plenty of food beforehand! We had to get a taxi back to the flat and had sore heads the next day!
Further Information and Resources
Visas – Free Entry for up to 90 days
As a British Citizen, you can enter Japan as a visitor for a maximum of 90 days without a Visa!
All European countries are also exempt from needing a Visa.
There are 68 countries around the world that are exempt, so check before you travel if you are on this list.
Best time to go to Kyoto
Late spring (March–May) and late autumn (September–November) are the best times to go to Kyoto and the rest of Japan, with less rainfall and mild temperatures.
Cherry Blossom Season is from late March/early April, but expect many crowds and expensive accommodation, so plan well in advance and book ahead.
If you want to go at other times of the year, do note that summer (June–Aug) is hot and humid (more likely to rain) and winter (Dec–Feb) is cold.
Useful words in Japanese
The Japanese language is phonetic. We found it quite easy to learn some words, especially after having been in Vietnam where it is much harder due to their language being tonal!
Most Japanese understand some English, but don’t always speak it so it is worth communicating in their language with these following words:
Ohayou gozaimasu – good morning
Konnichiwa – used for ‘hello’ and ‘good day’
Konbanwa – good evening
You can use “ohayou gozaimasu” before 10:30 am, as means good morning
“Konnichiwa” is used as a greeting for good day, but also as an informal greeting for Hello. Best to use it after 10:30am. The “nichi” in “konnichiwa” means day.
The “ban” in “konbanwa” means evening.
Sayonara – goodbye
Arigato gozaimas – thank you very much (you will hear this a lot in shops!)
Totemo yoi – very good (used for food and other things)
Oishi – tasty (used for food references)
Komen’nasai – I’m sorry
Mizu– water
Kudasai –please (when ordering something)
Sumimasen – excuse me or sorry
Useful Links we used when researching what to do in Kyoto
We used an amazing article (shared earlier) to help us make up our own itinerary – check it out Inside Kyoto
You may find this link useful for the Keihan Main Line
A handy link to check Train times and routes
You may find this link very informative about Bus routes
SIM Cards
Although Wi-Fi in Japan is rather good, you may want a data-only SIM to stay connected at all times, especially if you want to use google maps.
These are expensive in Japan, so you may only want to buy one per couple or group.
We got ours at Osaka Kansai Airport at one of the counters (after comparing prices)
We also found that airport shops offer a Wi-Fi portable device that you can use (like a dongle) but these seemed even more expensive (around £40)
SIM Card service plans (estimate prices as these may vary)
Data allowance: 1 GB
- Use period: 30 days
- Cost: 3000 Yen (£20.58 / US$26.80)
Data allowance: 2.2 GB
- Use period: 30 days
- Cost: 4000 Yen (£27.44 / US$35.73)
Data allowance: 3GB
- Use period: 60 days
- Cost: 5000 Yen (£34.30 / US$44.66)
Kyoto is an amazing experience and one to seriously consider as top of the list of places to visit in Japan. I know we haven’t been to other cities such as Tokyo, to compare, but we think Kyoto is a must and seems like a good place to start exploring Japan! We loved it and had an amazing week. Hope you get to enjoy it too!
Please don’t hesitate to comment if you have any questions about this blog or Kyoto, even if just to share your experience.
If you found this post helpful, please share the love on social media with friends.
If you’d like to, you can also check out our Gallery and follow us on Instagram

This guide is phenomenal!! Wish I’d had this before I visited a year ago.
LikeLiked by 1 person
Ahh thank you! Hope I can help you with another destination 🙂
LikeLiked by 1 person
Nice reading your article. My husband and I enjoyed your company at the Yamazaki Distillery. We chatted for a few minutes while enjoying the whiskeys…
I am checking out your blog on other places. You should go to the Phils but be careful.
LikeLiked by 1 person
Ahh I remember! It was lovely to meet you!!Thanks for the advice, we will be vigilant and report back 🙂
LikeLike
Loved it!! I really want to put this on my bucket list!
LikeLiked by 1 person
👍🙏
LikeLike
Hehe thanks! You can imagine how tiring travelling is from my blogs!!
You must go to both! Min 4 days in Kyoto to be able to really enjoy it!
If you do, maybe choose 5-6 temples/shrines you like the sound of (2 each day for 3 days and the 4th day to chill) Spend the rest of your time; afternoon/evening in Gion & Higashiyama 🙂 x
LikeLike
You blow me away with these blogs
Tara, how do you fit so much in/learn so much in 7 days?!! We definitely want to visit Japan, Rich’s cousin lives in Tokyo, but you’ve inspired me to see Kyoto!!! xxx
LikeLiked by 1 person
This is such a comprehensive guide! I went to Japan in 2013- but Tokyo and Yokohama area. Never made it down to Kyoto. I had no idea about the whiskey! I love whiskey!
LikeLiked by 1 person
Thank you!!
Kyoto next time maybe?
The whisky was fab 🙂
LikeLike